 Next Generation Hoardings
Installation Guide
Hoarding Installation: Panels vs Skins
Skins are practical hoardings: sheet materials fixed to timber studs on site. Here is how installation differs from prefabricated panels.
Two ways to assemble the hoarding
In this guide, skin hoarding means practical hoarding. Sheets of MDF or plywood form the face of the wall and are fixed to timber studs at the installation location. The NXGN manuals call this method practical hoarding and refer to the sheets as skins (SK).
Panel hoarding also uses a sheet skin, but the skin is attached to a timber frame to make a complete panel before installation. Those panels are then brought to site and joined along the hoarding line. The difference is how the wall is assembled, rather than a choice between two face materials.
Both methods use NXGN steel uprights and weight blocks. Their construction and fixing details differ, so start with the manual for the method you intend to build.
Panel hoarding: prepare panels, then install them
Start with the layout: the length and height of each run, door positions, returns and changes of direction. These determine the panels, door heads and corner details to prepare. A return takes the hoarding back towards the shopfront or work area; a splay forms an angled change in direction.
Fabrication brings the timber frame and sheet skin together before the site installation. Plan how the finished panels will be transported, unloaded and moved through doors or lifts, including the room needed to turn and position them.
On site, the prepared panels are joined and connected to their uprights using the panel installation details. Door heads, returns and splays have their own connections. Prefabrication moves work out of the site installation window, while panel handling, connections and finishing still need time.
Practical hoarding: assemble framing and skins on site
For practical hoarding, timber, sheet skins, uprights and weight blocks are delivered as separate components. Set out the same layout information before assembly, including openings and changes of direction. Allow space for storing materials, cutting timber and sheets, and working along the hoarding line.
The practical-hoarding details show how upright studs connect to the steel uprights and how skins are fixed to the studs. Door openings use doorway framing and door-head skins. Returns and splays need the additional studs and upright arrangements shown in their respective details.
This method shifts frame and skin assembly into the site programme. It can suit a project where fabricating complete panels in advance is impractical, provided there is enough working space and time on site. Check the delivery route for full sheets and timber as well as the supporting hardware.
Different connections, different drawings
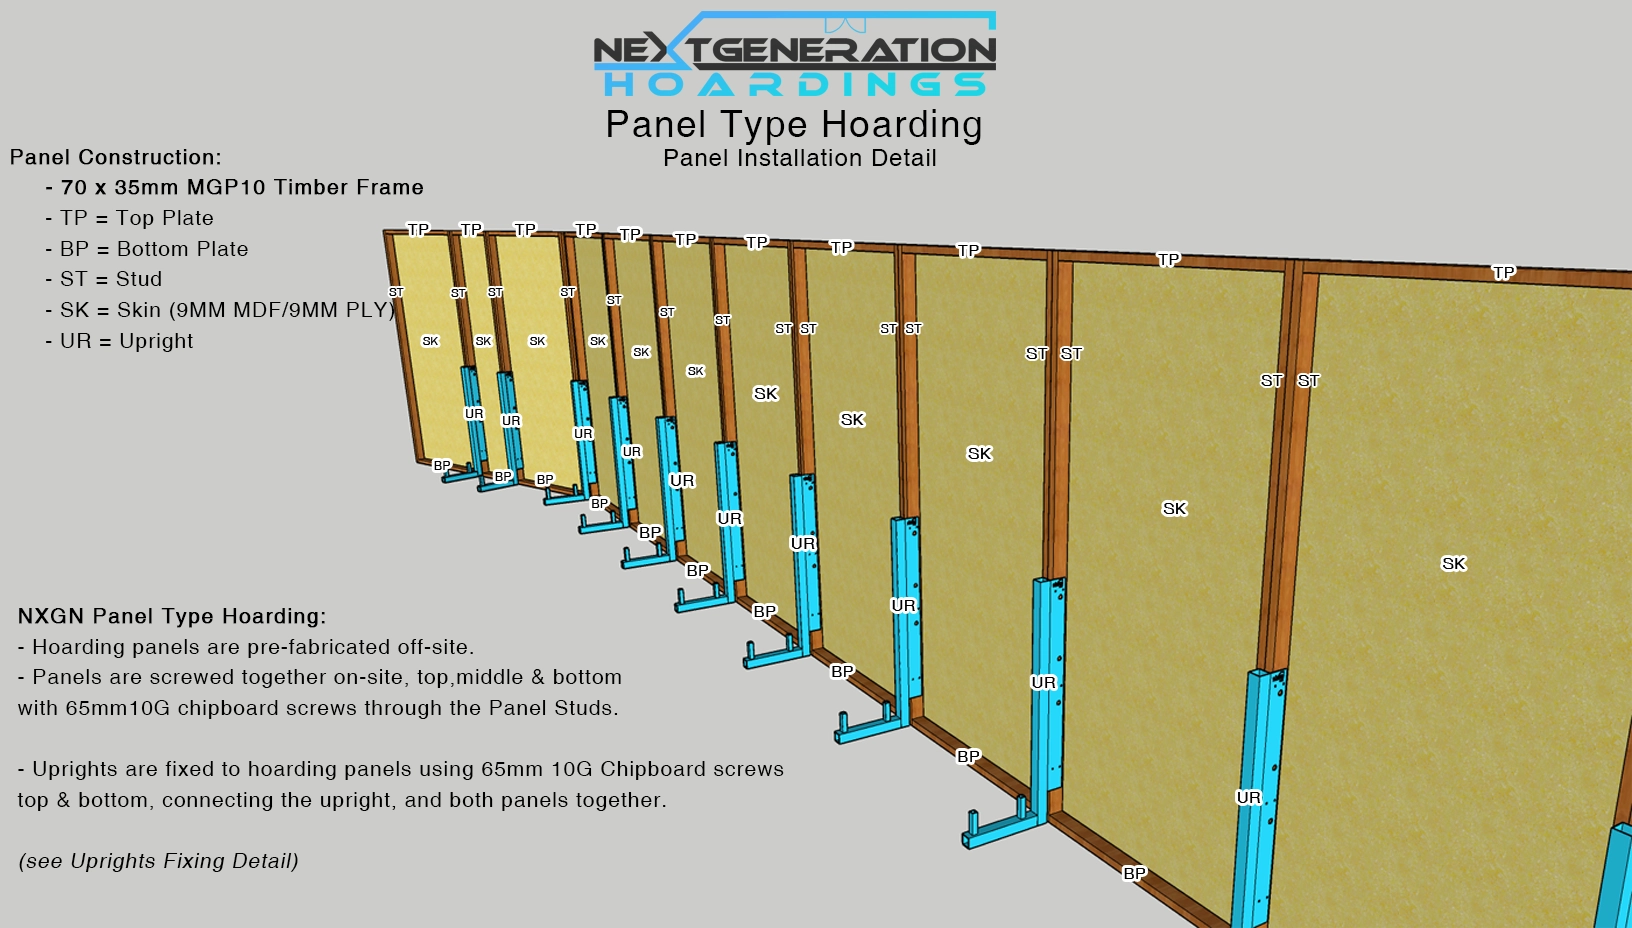
Panel hoarding: the installation drawing shows how completed panels connect to each other and to the uprights.
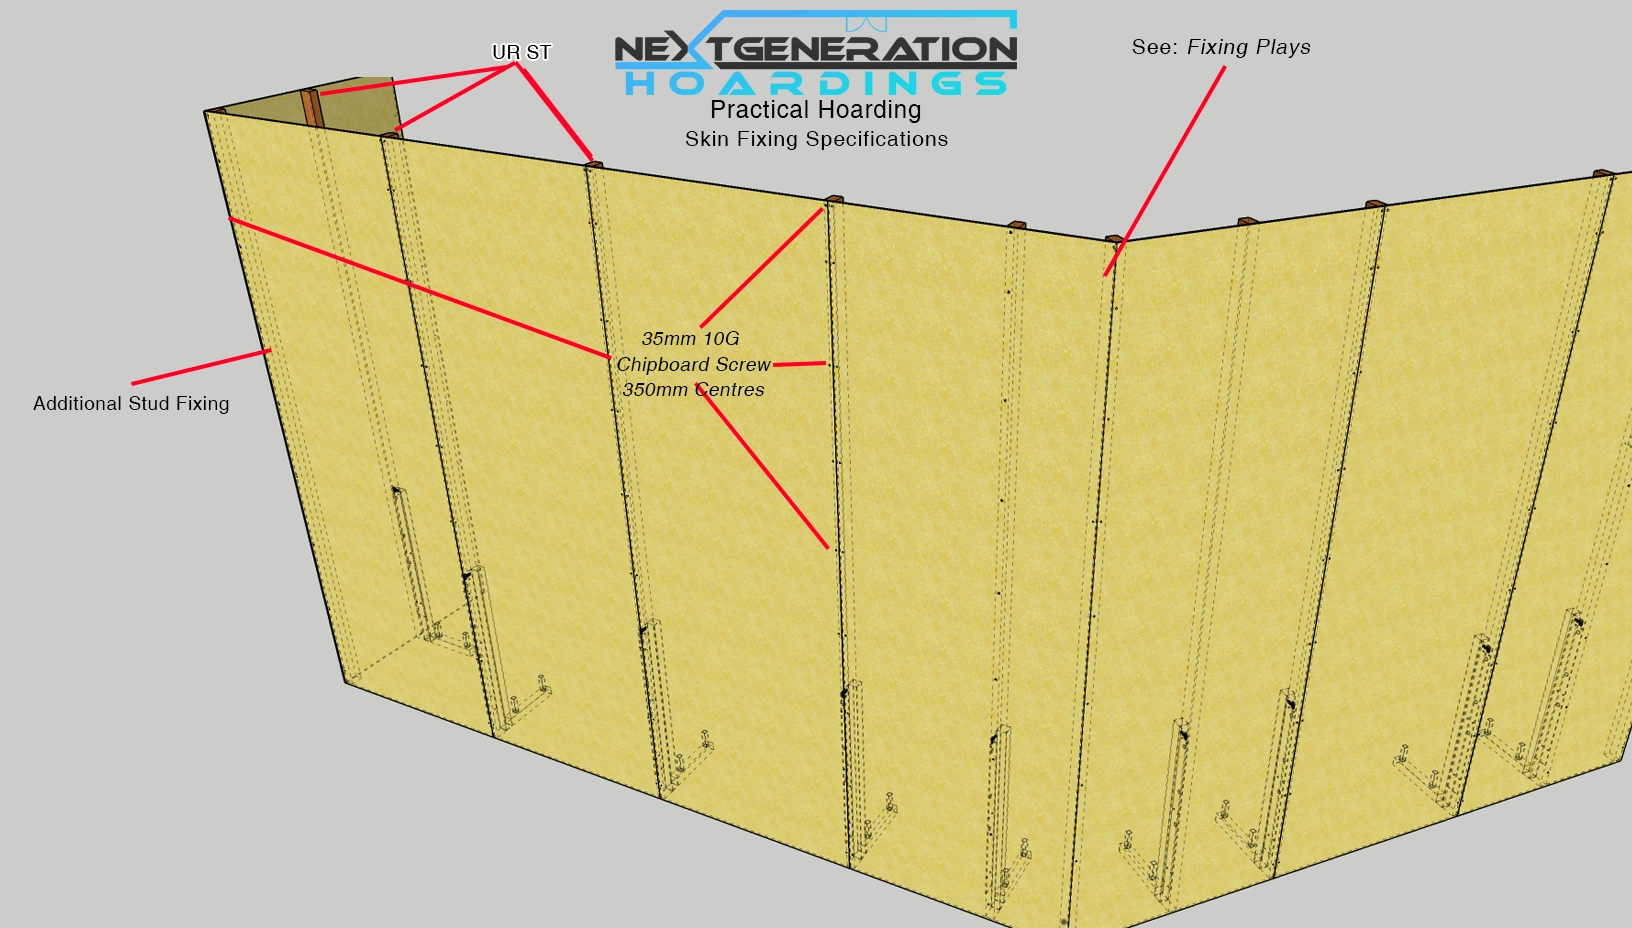
Practical hoarding: the skin fixing drawing shows the connection between the sheets and timber studs.
Plan the work around the installation method
| Stage | Panel hoarding | Skin / practical hoarding |
|---|---|---|
| Before delivery | Coordinate panel sizes, openings and corner details for fabrication. Arrange transport and handling for assembled panels. | Coordinate the layout and material quantities. Arrange a work area for cutting and assembly on site. |
| During installation | Position and connect prepared panels, with the supports and opening details shown in the panel manual. | Assemble the upright studs, framing and skins, including the details around doors, returns and splays. |
| Finishing | Allow for panel joints, screw positions, edge treatment and the selected face finish. | Allow for sheet joints, screw positions, edge treatment and the selected face finish. |
| Removal and storage | Plan handling and storage for any panels being retained, including protection of faces and edges. | Plan dismantling and sorting of sheets, timber and hardware, with space to inspect and store reusable components. |
Finish, reuse and total project effort
A consistent finished face depends on the framing, sheet alignment, joints and finishing work. Panels let you prepare more of that work before delivery. Practical hoarding brings more of it onto site. Allow time for the chosen paint, graphics or other face treatment in either programme.
Think about the next use when planning removal. Retaining complete panels needs suitable handling and storage; retaining practical-hoarding materials means separating and sorting the components. Reuse depends on their condition after dismantling and whether they suit the next layout.
Compare fabrication, delivery, site labour, finishing, removal and storage together. A shorter assembly window does not by itself establish the lowest total cost, and compact material storage does not remove the need for a suitable work area.
Take the method into your project plan
Use the comparison for an overview of the trade-offs, then record the layout and project requirements. Keep the matching installation manual alongside the plan.
-
Compare panel and practical hoardings
Review delivery, access, working space and preparation side by side.
-
Open the hoarding planner
Develop the layout, including runs, openings and changes of direction.
-
Browse the installation guide
Read the manuals or find a specific construction detail in the article index.
-
Request a project quote
Share the proposed layout, method, timing and site access information.