 Next Generation Hoardings
Installation Guide
Panel vs Practical Hoardings
Two ways to build a freestanding NXGN hoarding: prefabricated panels or assembly on site.
The difference is where the wall is built
Panel hoardings use timber frames and sheet skins assembled into panels before they reach the installation area. Practical hoardings are built in place, with the timber framing and skins brought together on site.
Both methods use the NXGN upright and weight-block system. The choice changes how you prepare, deliver and assemble the hoarding, so start with the available access, working space and installation window.
Panel and practical hoardings at a glance
| Consideration | Panel hoardings | Practical hoardings |
|---|---|---|
| Assembly | Frames and skins are made into panels before installation. | Framing and skins are assembled at the hoarding location. |
| Delivery and access | Plan a delivery route and handling space for assembled panels. | Move timber and sheets to the work area; check access for sheet sizes and material handling. |
| Work on site | Position and join the prepared panels, then complete supports, openings and finishing details. | Set out the framing, install the supporting components and fix the skins as the wall is built. |
| Preparation | Panel dimensions, door positions and changes of direction need to be coordinated before fabrication. | Plan the layout and material quantities before assembly; cutting and fitting take place on site. |
| Working space | Allow for unloading, staging and positioning the panels. | Allow for storing materials, cutting and assembling the wall. |
| Installation time | Prefabrication moves frame and skin assembly out of the installation window. Delivery and positioning still take time. | Frame and skin assembly form part of the site programme. Sequence the work around access and operating hours. |
| Shared components | Timber framing, sheet skins, steel uprights and weight blocks, with details for doors, returns and splays. | The same component families, arranged and fixed using the practical-hoarding details. |
How the two methods are assembled
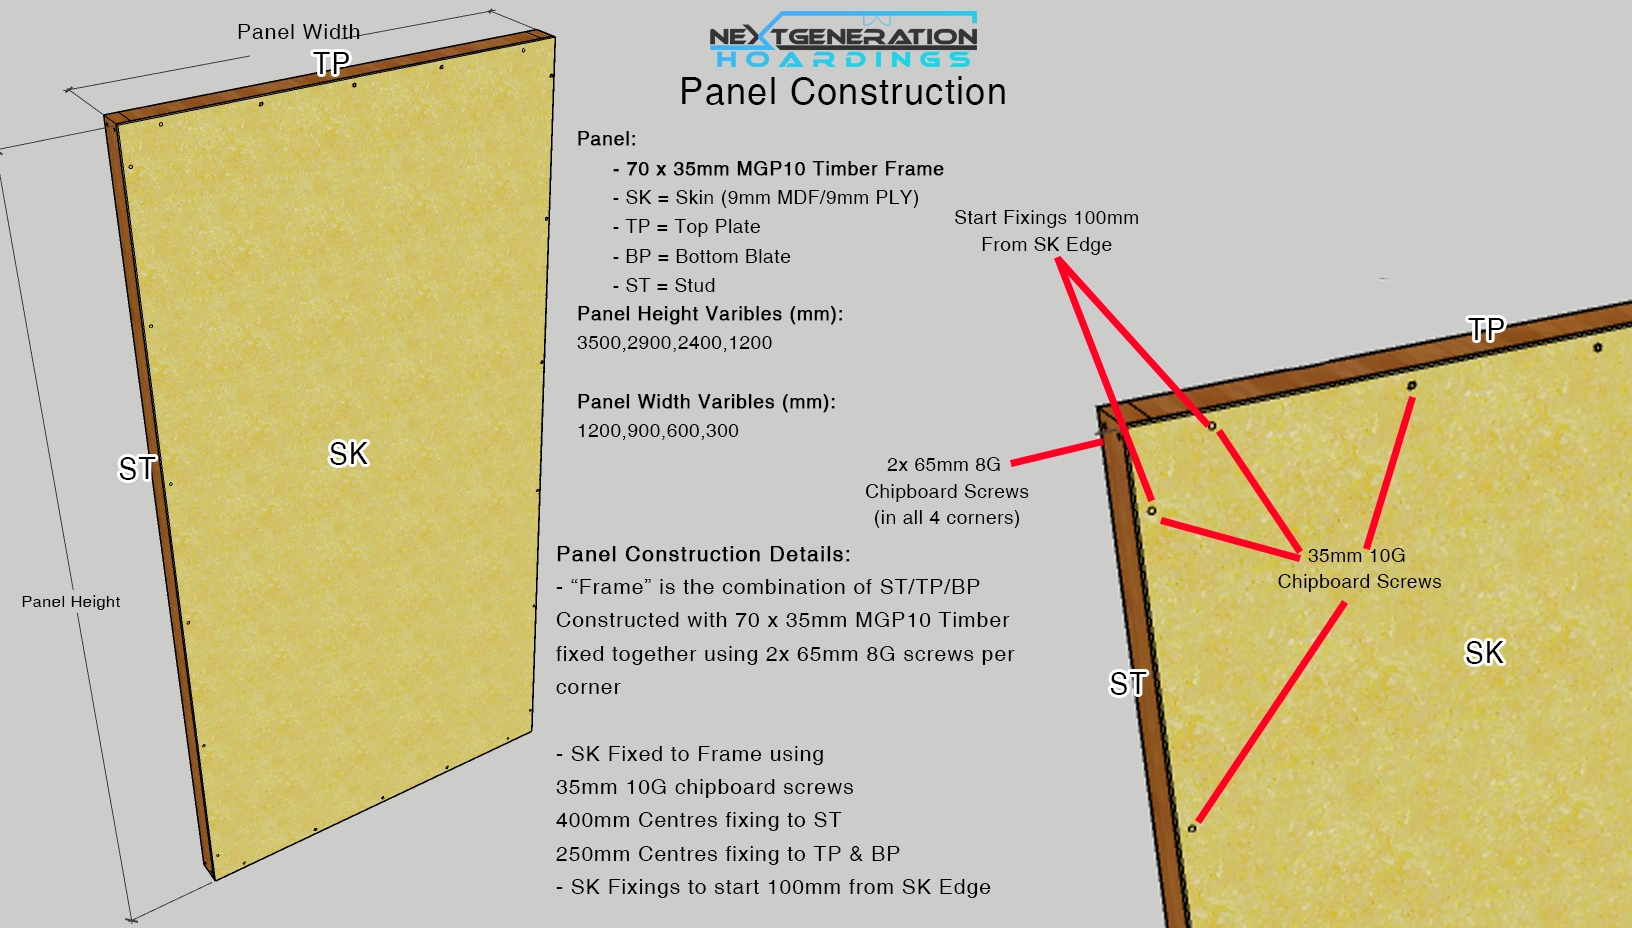
Panel hoarding: the frame and skin form a panel before it is installed.
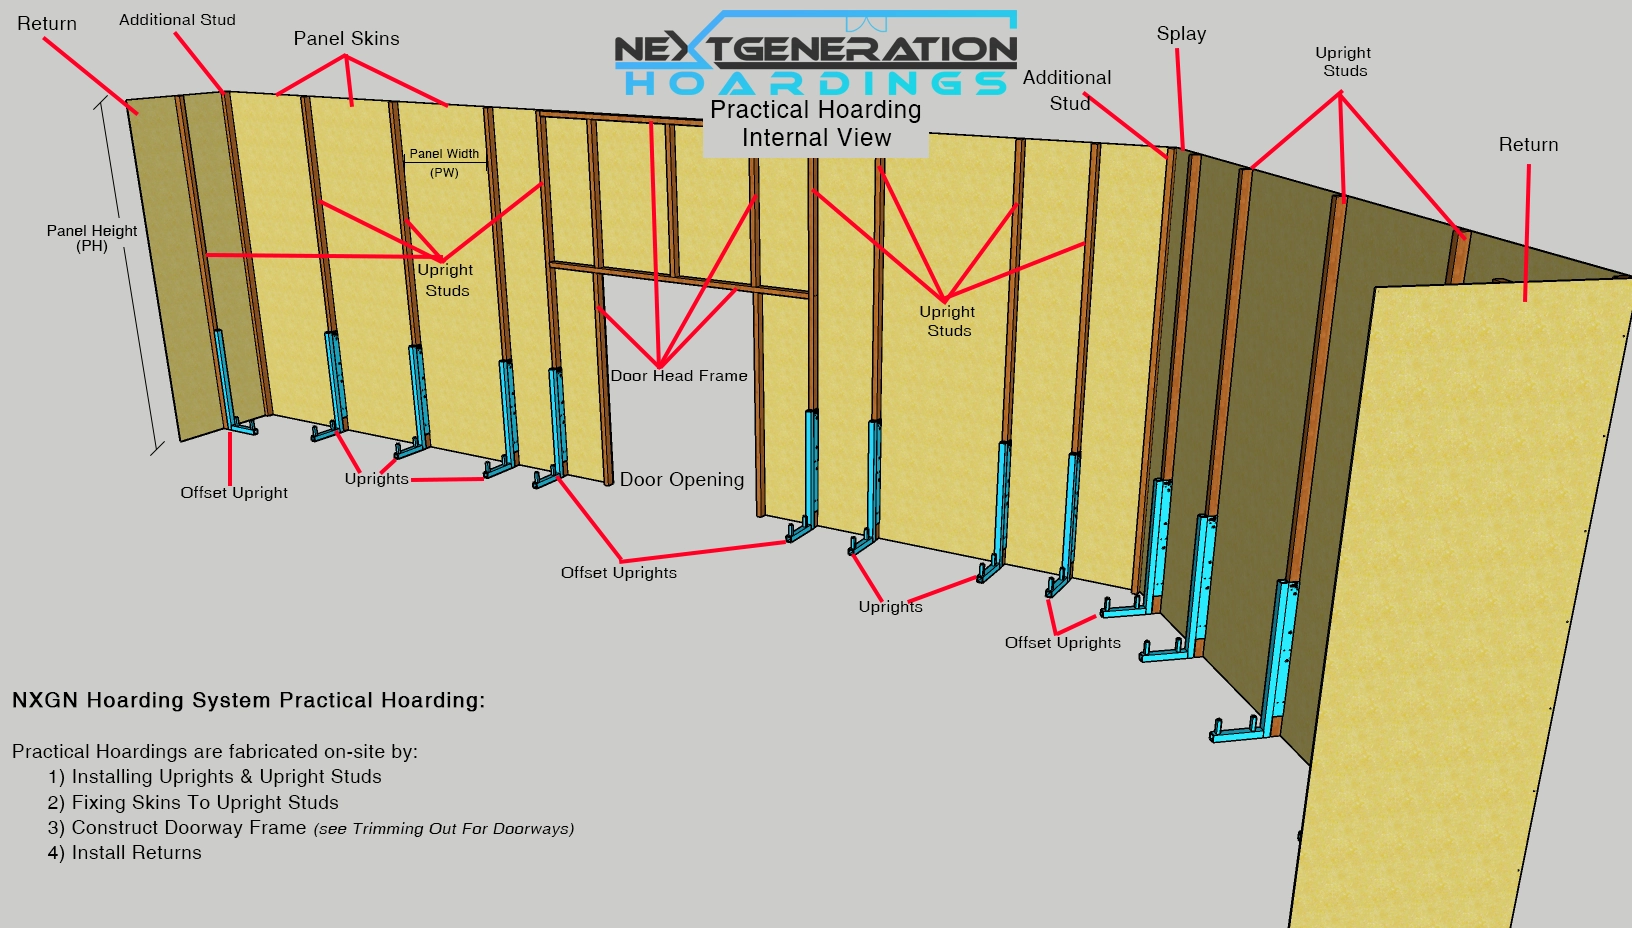
Practical hoarding: framing and skins are assembled along the hoarding line on site.
Choosing a method for the site
Consider panel hoardings when you can fabricate ahead of the installation date and have a suitable route for bringing assembled panels into position. Check loading areas, doorways, lifts and the space needed to handle panels along the proposed line.
Consider practical hoardings when assembling the wall in place suits the available access and working area. Bringing materials in separately changes the handling task, but you still need room for sheets, timber, cutting and assembly.
Compare the whole job: fabrication, transport, site labour, finishing and removal. Neither method is automatically faster or cheaper for every project. The amount of work completed before delivery and the constraints at the installation area determine the trade-off.
Continue with the installation details
-
Panel hoarding manual
Construction notes, panel assembly and installation, door heads, uprights, braces and returns.
-
Practical hoarding manual
On-site construction, upright fixing, doorways, frames, skins, returns and splays.
-
Uprights and load ratings
Fabrication, fixing, setouts and the supporting weight-block details.
-
Installation guide and article index
An introduction to the system and the complete reference index.